
How To Build your own Enclosed Raised Garden Bed
This DIY enclosed raised garden not only looks beautiful, but it does a great job of keeping animals out of your garden beds. A perfect weekend project, you won’t believe how simple and inexpensive building your own fenced raised garden bed can be!

Okay friends, this one has been a long time coming! The truth is, I wasn’t planning on sharing this enclosed raised garden bed tutorial on the blog (mostly because our lives were pretty chaotic when we built it and I just didn’t have the space to put together a tutorial at the time). But, I don’t think I’ve ever shared a photo of it that hasn’t resulted in countless messages wondering all about it.
And so, I figured it was about time I put together a tutorial.
Because I hadn’t planned to share it here on the blog, I didn’t snap many progress photos along the way. So, what follows is my attempt to piece together a tutorial working backwards from the finished product and throwing in the few pictures I did capture to send to my Mom as we were working on it. If there’s anything you find yourself wondering about or need further clarification for, please don’t hesitate to reach out in the comments below.
SUPPLIES (amount dependant on your garden size):
- 2×2’s for centre supports, to join corners + to frame the gate
- 2×4’s to join sections together
- 4×4’s for the entrance corners
- 1×6 cedar fence boards for the garden sides + gate
- 2″ outdoor wood screws
- gate hinges and latch
- landscaping cloth
- soil
- lattice for climbing vegetables
- hanging basket hooks


We started our garden build by clearing out a garden space, removing all of the grass and laying landscape fabric over the entire area for a clean start. With everything cleared out, we mapped out the space and came up with a design plan for our build.
Outside Dimensions of our DIY enclosed Raised Garden

Build plans for our DIY Enclosed Raised Garden

We started by building the outside frame of our garden. Because our cedar fence boards came in 6 foot lengths, we built the garden walls in 6 foot sections – using our 1×6 cedar fence boards as the sides and top rails and attaching them together with 2×2 support posts every 2 feet.

The outside walls of our garden measure 3 feet tall, which means all of our 2×2 support posts and the 2×4’s we used to join our sections together were cut to this length. As you can see, we placed three 1×6 fence boards together at the bottom to form the side walls of our garden and then spaced out two more fence boards along the top to make a fence.


Once we had all of our outside pieces built, we used 2×2’s to join together the corners and 2×4’s to join together our 6 foot long sections down each side (you can see where we placed everything in our build plans above).

With the outside walls all built and put in place, we moved on to building the inside walls of our garden. We built the interior walls in much the same way as the exterior walls, working in 6 foot sections with our fence boards and placing 2×2 supports every 2 feet. We made these walls just three 1×6 boards deep, skipping the top fence around the inside. We chose to make our garden 2 feet deep from the exterior walls to the interior walls, so we adjusted the length of our inside walls accordingly.
Interior DIMENSIONS OF OUR DIY ENCLOSED Raised GARDEN

Once all of the inside walls were built, we attached them together in the same way we had the outside walls, using 2×2’s at each corner and 2×4’s to connect the longer wall sections (as pictured in our build plans above).

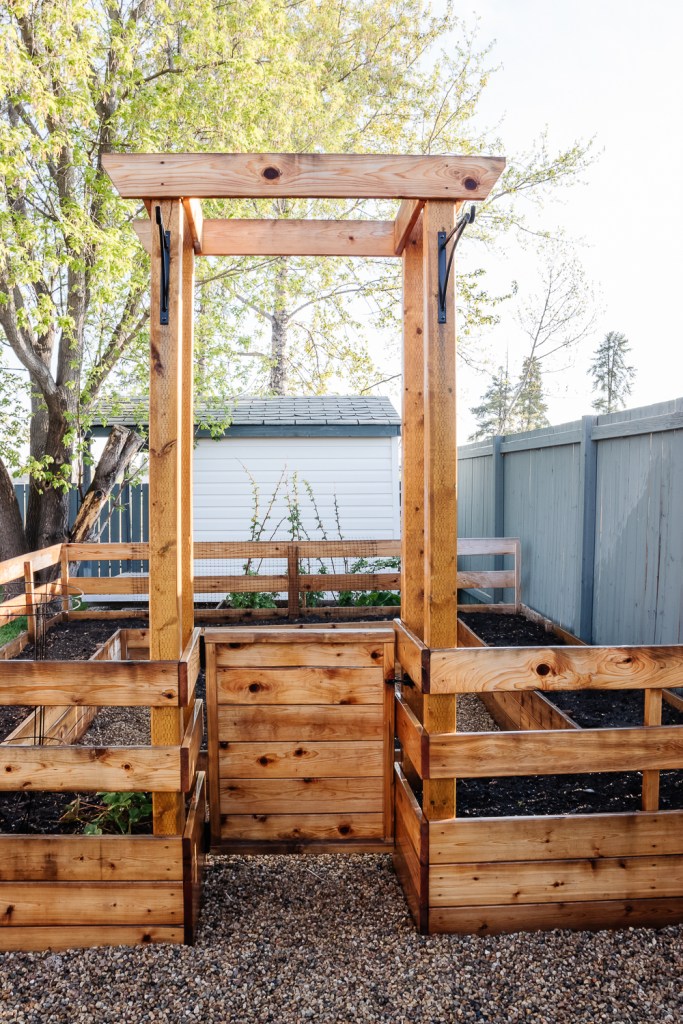
We did however decide to change things up around the entrance to our garden space. We really wanted to make the entrance feel a bit more substantial, so we chose to use four 8 foot long 4×4 posts in each inside corner. We also decided to mount the gate on the back posts rather than the front to offset the entrance from the outside of our garden.


We built the gate by making a square frame out of 2×2’s, slightly smaller than our 3 foot wide entrance. We added some 1×6 fence boards to cover the frame horizontally and mounted it with some inexpensive hinges and a gate latch onto the back 4×4 posts.


We finished the entrance off by framing out the top of our 4×4 posts with some 2×4’s, cutting the front and back pieces at an angle just to add a little extra design detail.


We put our old 4×6 garden boxes to work too – using one in the centre of this enclosed garden space and then one in behind to make a raspberry patch.


Once we had everything all built and put in place, we filled the garden boxes with some good quality soil and finished the entire space off by spreading pea gravel throughout.


Now, all that’s left to do is to get planting!


See the full video tutorial below:
I hope this leaves you feeling inspired to put together your own garden space and maybe even build a raised garden bed of your own too!

Check out this quick + easy raised garden box tutorial if you’re looking for something a little simpler to build.

And, if you’re curious, you can read a bit more about our first gardening season here.

Wishing you the most lovely day my friends!
PS. This post may contain affiliate links. For more information please see my privacy policy.


Hi! Love your raised garden bed build! Approximately how much did the lumber cost for it? I’d love to build something similar and was wondering if this would fit within or near my budget of around $500. Thanks so much!