
How to Build your own DIY Raised Garden Bed
The easiest way to build your own DIY raised garden bed and plant your own vegetable garden this Summer!

Happy weekend my friends!
It’s time again for another instalment of our cozy living series. Not only am I sharing my own ideas to bring a little cozy to our lives (yes, even through these warm Summer months!), but I’m also teaming up with an amazing group of blogging friends to bring you even more cozy living inspiration, so be sure to check out their cozy Summer ideas at the end of this post.
This month, I can’t wait to show you how we built and planted our own DIY raised garden beds!

For as long as I can remember, I’ve wanted a garden of my very own.

Not the kind filled with pretty flowers (though I’ll take one of those too please!), but the kind full of all things edible!

I’ve got such wonderful memories of helping my Grandma in her garden growing up – snacking on all the raspberries and peas we could eat and then bringing a cooler full of garden veggies home with us every time we’d go for a visit.

I can’t wait to make those same memories with our little man!

Sharing with him the journey of planting, nourishing, and growing our own food – and of course the best part, harvesting and eating the fruits (and vegetables) of our labour!

I’ve been dreaming of our own vegetable garden for years now…
Spring would roll in and I’d be full of good intentions, dreaming of all the yummy veggies we’d plant. Things would be so busy (as they often tend to be), and without even noticing, Spring would turn to Summer and I’d have missed my chance for another year.
Not this year my friends!
Despite all of the chaos of this renovation we’ve been plowing through since Fall (read more about it all here), we dropped it all for one little weekend to build ourselves our very own garden space.

And I’ll tell ya friends, it was SO much easier than I’d imagined it would be! We had four DIY raised garden beds built and planted in just a matter of hours and when all was said and done, I found myself wondering why on Earth we hadn’t tackled this sooner! And so, just in case you’ve been wishing for, but putting off building your own garden space, I wanted to share our plans for the easiest ever DIY raised garden beds so you can finally create your very own garden space too.

HOW TO BUILD THE EASIEST EVER DIY RAISED GARDEN BED
The very first thing you’ll need to do is figure out just how big you want your raised garden bed(s) to be. Ideally, a raised garden bed should be no wider than four feet. The average reach for most people is about two feet, so anything larger than that and you’ll be forced to walk through your garden to get to the plants in the middle. As far as the length goes, the sky’s the limit, though we did choose to work with the length of the lumber we’d purchased. Of course, you’ll also want to consider the space your hoping to place the boxes in to ensure you’ll have enough room to walk all the way around your garden beds.
Based on the space we had to work with, the 6′ cedar boards we’d found on sale and that two foot reach rule, we chose to build two different sizes of garden beds – two that measured 4 ft. wide x 6 ft. long and then two that measured 2 ft. wide x 4 ft. long, totalling four raised beds in all. The plans below are for one raised garden bed of any size, just adjust any measurements to suit whatever size you’re building for your own garden.
SUPPLIES
1×6 cedar boards
2×2 cedar boards
deck screws
BUILD IT
one. Cut your cedar 1×6 boards to size. You’ll need 2 boards for each side of your garden box.

two. Cut your 2×2 into six 10″ lengths (one for each corner or your garden bed and two for supports in the middle).
three. Build your sides. Starting with your longest sides (if you’re building a squared bed, it won’t matter which sides you start with), lay out two pieces on the ground, long edges together. Lay a 2×2 across the 1×6’s, matching the ends of the 1×6 boards to the edge of the 2×2, then fasten in place with 4 wood screws (2 into each 1×6 board) – these will form the inside corners of your box. Repeat this twice more to add another 2×2 to the middle and at the other end of your 1×6 boards.

Then, do it all over again to make the other side. You should now have the two longer sides of your garden box.
four. Attach your end pieces. Now, it’s simply a matter of attaching two boards to either end, using two screws through the 2×2 into each 1×6 board.

And that’s it! Can you believe it?! Your very own raised garden bed in just minutes!

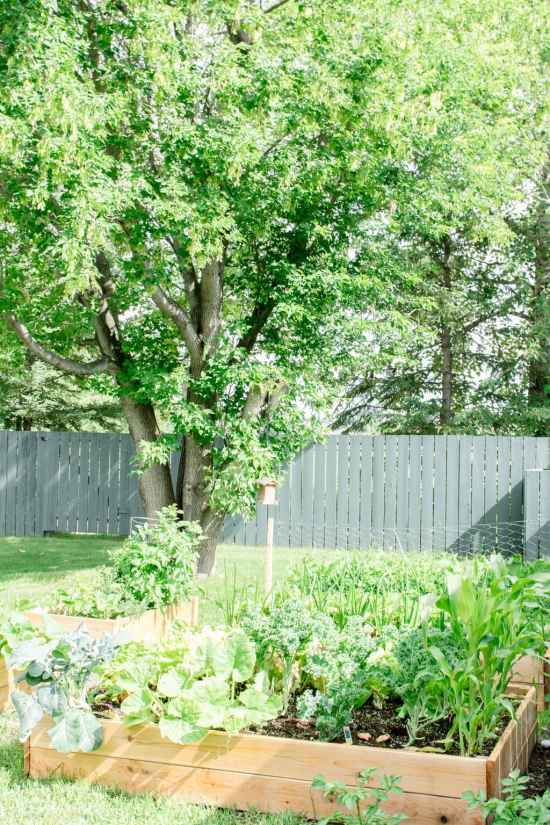
Then, it’s just a matter of finding a sunny spot in your yard to place them…


Fill them with soil (I lined the bottom with cardboard first to help block out any weeds) and get planting!


If you’re curious about what we’ve planted in ours this year, you can read all about our first vegetable garden here.

You won’t believe how much it’s all grown already! I’m hoping to share an update of it all on my YouTube channel next week, be sure to subscribe so you don’t miss it!
I couldn’t be happier with how these DIY raised garden beds turned out! And we are loving having our very own garden even more than we’d imagined!

And of course, don’t forget to see how my talented friends are getting cozy this Summer too!

Finding Silver Pennies//Making It In the Mountains//Sincerely Marie Designs//Town and Country Living
Wishing you a lovely weekend friends!
PS. This post may contain affiliate links. For more information please see my privacy policy.


Oh my goodness, I loved seeing the photo of your grandmother’s garden. Such lovely memories for you and wonderful that you’re recreating this with your own kids. We built raised beds a few years back and we love having fresh veggies in the back garden. Conor loves eating tomatoes and raspberries straight from the bed.
Thank you so much Danielle! I have such fond memories, I can’t wait to recreate them with our little man. I picture Carson grabbing veggies on the go just like Conor!
You’ll love your garden for years to come, Kristi! We have raised garden beds too, and the first couple years only planted vegetables and herbs. I’ve now devoted about a third of the garden area to grow cut flowers that I can bring indoors. Like you, I got the idea from my grandma. Enjoy your garden – your son will have fond memories of it!
Oh, a bed full of cut flowers is a brilliant idea! I may just have to try that when we have a few more to fill next year! Thanks for sharing Jennifer!
This is something that Josh and I have wanted to do for years! After seeing how awesome your beds look I’m wishing we had jumped on the project this year. How cool to have such good memories of you and your grandma in the garden, such a great tradition to carry on. Great tutorial, Kristi!
Thanks so much Amanda! We definitely waited far too long to build our own too, but so glad we finally carved out the time to build and plant our garden this year. Fingers crossed y’all get to try it for yourself next year!
Our garden is only 14×14. You have inspired us to do boxes with paths to make more accessible! Love the cardboard idea, to block out weeds! Great ideas!
Thank you so, so much Angela! I’m thrilled to hear that you’re feeling inspired to make a few changes with your own garden! Happy gardening!
Thank you very much! I had to replace the wood of my raised beds but wasn’t sure how to do it. This worked out wonderfully and my two 4×4 beds are beautiful.
Oh good! I’m so glad you found this helpful! Thanks so much for sharing Kim!