
DIY Gallery Wall Tutorial
So, I feel like I’m saying this ALL. THE. TIME. lately, but it’s been a crazy busy week so far here in the Mercer house!
Our handsome little man turned two this weekend and, though we didn’t plan much in terms of a party, we enjoyed a ton of family time celebrating.
With our busy weekend, I didn’t really get started working on the gallery wall until Monday. I’m SO, SO sorry for the delay, but hopefully you’ll find that it was worth the wait!!!
The gallery wall, as it’s come to be known, is definitely a fast growing trend in home decor and for good reason, they really are a versatile way to fill a large wall space with a ton of creativity and personality!
Since moving into our house last fall, this super awkward wall in our living room has had me stumped.

With it’s weird jump out and then back in, I’ve had no clue how to decorate it. Enter the GALLERY WALL – I’m pretty sure if it weren’t for pinterest, this wall would remain empty and void of any personality forever!
Desperate to get some pictures up on my wall, I decided to create my own little gallery wall from the pile of frames we still had boxed up in our basement. Fortunately Unfortunately, I don’t have a stellar picture, but this one of Brady reading a bedtime story to Carson will give you a good idea of what an epic fail it was!

Whoops! Turns out gallery walls aren’t as random as they may appear and there are better ways to hammer the picture hook in the right spot than trial and error … who knew?!
This time around I decided to take my time and do it right! I chose some bigger frames to really help fill up the space (clearly that was an issue with my first try). I played around with different layouts for weeks, leaving things set up on our guest bed and shifting pieces around every time I walked by.

Originally, I was drawn to the layouts that lined up to make a perfect square – I liked how put together they looked and my facebook fans agreed when I polled them on their favorites. Then I started looking through zillions of gallery walls on pinterest (why didn’t I think to do this at the beginning?!) and I realized that a less perfect look would not only allow me to add to it easily down the road, but it turns out I really liked that sort of haphazard, yet still collected look (you can see my favorite layouts here). Plus, I came across these and just had to add them into the mix!

So, after playing around with different layouts on the bed yet again, I finally decided on the one I thought looked best.
Just to be sure that everything would fit just right, I measured the width of the three sections of wall (divided up by that weird jut out), taped some kraft paper together to replicate that width, and laid it all out on the living room floor. *You could totally skip this step as you’ll get another chance to move things around later before actually nailing into the wall, but with my weird wall(s), this step was extra useful.

I ended up having to flip a few things around as I realized that some of the frames were going to hang over the edge of the wall. Here’s where I finally landed.

Next up, I traced all of my frames onto the paper and cut them out had Brady cut them out while he was relaxing on the couch watching golf (he offered!). I marked the nail spots from the frames onto the paper cutouts and B (clearly this wasn’t a job for little 4’11 3/4″ old me) taped them onto the wall with painters tape to recreate what I had going on the floor. *Tip: it definitely helped to have pictures of the planned layout to look back on to make sure we got everything in just the right spot.

Letting it sit for the day on Tuesday gave me a chance to make sure the layout was just right and using painters tape allowed me to adjust things as needed. Once I was absolutely sure everything was just where it should be (where was this careful thought the first time when I needed it?), all I had to do was hammer a hook into the holes I marked on the kraft paper, rip it all off and hang up our pictures.

I wish I could take credit for this brilliant idea, but in my search for inspiration (and my subsequent online frame shopping), I actually came across this handy video tutorial that the folks at Pottery Barn put together. As I was doing this, I wondered many times if it would be as easy and seamless as it appeared to be in the video and, let me tell you, nobody was more surprised to learn that it absolutely was (well, maybe Brady)!
And …..
Here it is!!!


Need some inspiration for your Gallery Wall? Here’s a great place to start!
Already have a gallery wall in your home? Did you plan it out or wing it?

Wishing you such a lovely week!!!


Ok this is awesome!! I love that you added the letters and antlers. My favorite gallery walls are the ones that incorporate elements other than frames. I think it helps bring even more character and personality to it!
Thanks SO much Bre! I totally agree … I adore the eclectic look of gallery walls that include pieces other than frames too!
This turned out gorgeous! The antlers are lovely, love it all!
Awwww, thank you SO much!
Great idea to use the paper to come up with a good composition. I’ve done that once and it worked like a champ!!
🙂
hugs x, Crystelle
Crystelle Boutique
Thanks Crystelle!!!
I love, love, love it. It looks totally amazing. I adore the mix of wood, white and gold and all of the pictures and portraits. Beautifully done. Thanks tons for linking to Inspire Me.
You are just too sweet!!! Thank you SO, SO much for your kind words Marty!!!
You did a great job here! I love the way that you spelled out exactly how you did this. Making the paper templates really is worth the time and effort, isn’t it? And you were smart to leave the section of wall by the window blank until you know what you’ll be doing with curtains.
Thanks so much for joining Grace at Home!
Thank you SO, SO much for stopping by Richella and sharing SUCH kind words!
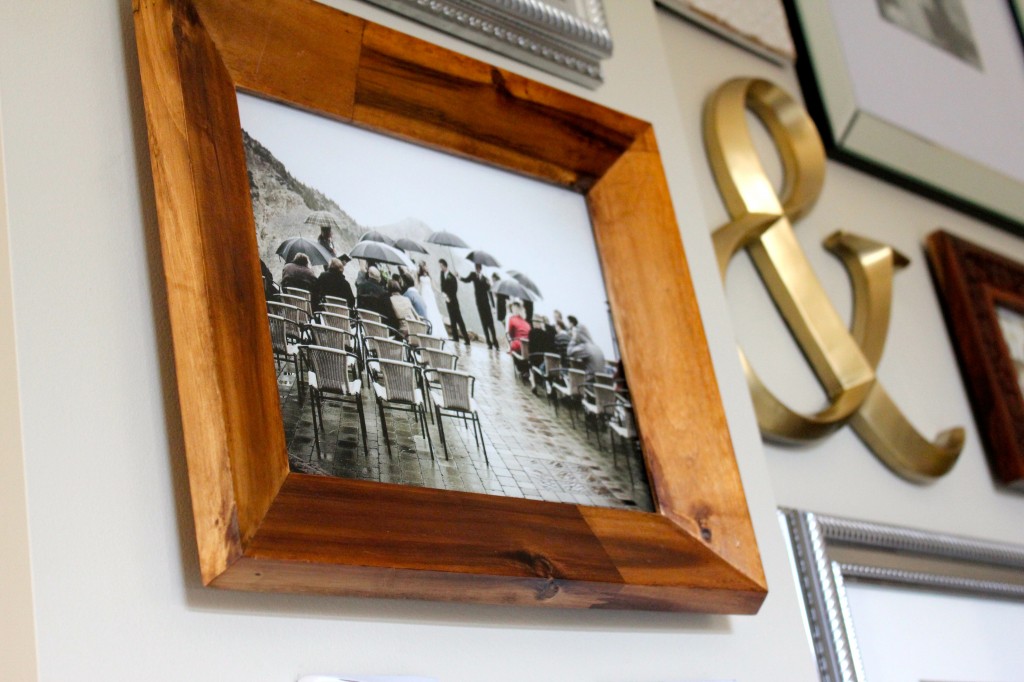
Wow, your wall turned out great and I love that wedding photo! Thanks for sharing at The Makers 🙂
Thank you so much!!! It’s so nice to finally have some pictures up in our new(ish) house!
The paper looks like a lot of work but totally worth it. I LOVE the antlers! Thanks for sharing with us at Cook it! Craft it! Share it!
Thanks Kelly! Yes, the paper is definitely more work (though not as time consuming as I’d imagined), but absolutely saved a ton of time mounting everything in just the right spot! Thanks for stopping by!
I love this! I’m totally one for just banging a nail in the wall and hoping for the best 😉 Thanks for linking up with Tuesday Tutorials #pintorials
Hahaha! I was too! Thanks for stopping by Kate!
Your gallery wall came out great! I’m working on a huge wall above our staircase and using the same method that you used. It’s such a time saver to be able to position things prior to actually just putting things up.
Thanks Erlene! Good luck with your project!!!
Wow great job! Such a big difference! Thanks for the tutorial! I want to try this in my bedroom!
Thank you Amy!!!
I’d love to do a gallery wall. Thanks for all the tips! I’m sure my first attempt would have looked just like your first attempt, haha!
Also, love your rainy day wedding pics! 🙂
Thank you Lila!!! That’s what I get for winging it 😉 Have a lovely weekend!
Wow, your wall looks amazing! I have a sad looking gallery wall that needs some design help so I will try your ideas!
My weekly Say G’Day linky party is on again this Saturday so please pop by and join in if you have a minute!
Best wishes,
Natasha in Oz
Thanks Natasha!!! I’ll be sure to stop by!
You did such a great job on your gallery wall! It’s beautiful! I’ve tried this process, but pooped out because I didn’t want to take the time to cut out the shapes. And now my gallery wall looks like poo and I need to redo it! Ha!
Awww Allison, that’s how I felt the first time around! Definitely worth the extra time!!! Thank you so much for your kind words and have a lovely weekend!
Great DIY and Happy Birthday to your son. Thanks for linking up with us at the #WWDParty. Have a wonderful week ahead.
Thanks so much Antionette!!! Wishing you a lovely weekend as well!
Brilliant! I like the collected look. As much as I love perfect square aligned galleries when I see them on Pinterest, I think I’ll go with the same kind of wall as you when I do mine… And I think those are actually more difficult to achieve.
Thank you SO much! I think you are right, it is definitely harder to achieve a cohesive look with a more random layout, but I think as long as you have some common elements and don’t let things get too far away from one another, it’ll look awesome! Have a lovely week Magali!
Your gallery wall turned out beautiful. Since we repainted the family room I haven’t hung a single picture because I never liked the way they looked. I can see that using this simple technique will vastly improve my decorating skills! Thanks for sharing.
Thank you SO much Patti! It definitely helps to visualize things, plus it’s an easy way to make sure the hooks are right where they need to be when you do decide where you want things 🙂
I love this tutorial!! I promised to help a friend of mine create a kids art gallery wall and these tips are perfect.
I hopped over from the My Pinterventures link up.
~Cheryl
http://snaps-of-ginger.blogspot.com
That’s great! I’m sure these tips will help! Thanks for popping by!
Oh my goodness. I love your gallery wall! What a great way to put it together. I want to do one too, but the thought of it has been so intimidating that I just haven’t tackled it. This just makes it seem so much easier. Thank you for sharing at What We Accomplished Wednesdays. Have a great week!
Blessings,
Deborah
I’m so glad you’re feeling inspired Deborah! It really was super easy with the paper templates! Thanks for stopping by and have a lovely week!
Looks great! I would love it if you joined and contribute your awesome posts at my link party at City of Creative Dreams on Fridays 😀 Hope to see you there at City of Creative Dreams Link Party.
Thank you for the invite Shanice!!! See you then!
Lovely!
I couldn’t agree more – it’s absolutely ALL about the templates.
Thanks for including links to your sources, especially the gold antlers and ampersand. (I was just looking for something like this on Etsy last night!) Sorry about your too-white M. Choosing colors can be pretty tough online.
And a big high five for the perfect ‘gathered over time’ look. I have a hard time mixing metal and wood frames, etc., but your gallery looks just exactly right. All of your pieces look like they were just waiting to be together – in just the right place!
You are too sweet Mary Ann! Thank you SO much for your kind words! Wishing you a lovely week!!!
Love how this turned out, Kristi! The mixed finishes are totally my jam!! Great job! 🙂
Thanks SO much Christina!!!
~what a fabulous wall! I’m working on one currently and yes, it takes some planning to get that perfectly haphazard look!! Love how yours turned out and the great use you made of a tricky wall space.
Tracey
Thank you SO much Tracey! Looking forward to seeing how yours all comes together as well!
Your planning paid off 🙂 🙂 — looks nice
Thanks so much Betsy!
Great gallery wall! I just started one in my house and putting nails in my new walls made me so nervous. I like the hanging tutorial you shared!! 🙂
Thanks Stephanie! Using the paper is SUCH a fool proof way of making sure everything ends up where you want it to! Plus, you get a chance to test it out before committing!
Just stopping back by to let you know I will be featuring this at the party tonight! Thanks for again for sharing.
Blessings, Deborah
Thank you SO, SO much Deborah! I can’t wait!!! Have a lovely week!
Just wanted to stop by and say thank you for linking up to Merry Monday linky party & helping support the first party. Hope to see you next week 🙂
You are SO welcome! Thanks for hosting Erlene! Looking forward to next week!
Your wall looks brilliant! I love the idea of breaking up the pictures with hanging ornaments. I’m going to attempt a picture wall in our downstairs toilet, bet it won’t turn out as good as yours though 🙁
Thank you Gina!!!! I’m sure it will be lovely! Definitely trace and hang the paper templates to check things out first and I’m sure you’ll be happy with how it all turns out 🙂
Hi Kristi, I’m a big lover of gallery walls, and yours looks fabulous! I’ll be sharing it tomorrow at Be Inspired, thanks for joining in!
Thank you SO much Debra!!! Looking forward to it! Enjoy the rest of your week!
This turned out so great! Where did you find the antlers?!
Thank you SO much Kellie! I had terrible service at the shop that I purchased them from, but you can find the exact same ones here and the reviews look much better! https://www.etsy.com/listing/152557016/gold-antler-coat-rack-gold-faux?ref=sr_gallery_16&ga_search_query=gold+antlers&ga_ship_to=ZZ&ga_search_type=all&ga_view_type=gallery
Hey! Thanks for stopping by our Flaunt It Friday Link-up! We liked your link so much you are one of our features tomorrow!! Hope you will stop by again! -xoxo Nicci
Awwww, that’s GREAT news! Thank you SO, SO much Nicci! Working on my most exciting project yet this weekend, so I’ll definitely pop by to share next week! Thanks again!
Your second try turned out great–maybe the second time is a charm, right? Thanks for linking this up to Frugal Crafty Home Blog Hop!
I guess so! At least I learned my lesson, even if it was the hard way. Thanks so much for popping by Carrie!!!
What a great project that turned out beautifully! Projects like this are definitely worth the extra steps so that you can make sure you have it exactly the way you like it!
Thanks for sharing at Wow Me Wednesday! I hope to see you back this week!
Thank you so much Tshanina!
Love the Gallery wall! I am working on my gallery wall right now for my living room, this gives me the inspiration I need to get it finished!
Thanks Tara! I’m so happy to help! I’m sure it will look fabulous!!!
Looks amazing! Great tips, thanks so much for sharing. You’re being featured, so hop back over for Amaze Me Monday…
Blessings,
Cindy
Oh wow! Thank you SO much Cindy!!! Enjoy the rest of your weekend!
This is great, a well put together gallery wall is hard. I am always wondering if I have achieved what I was trying to with it. You did a great job. I love the pops of gold here, so cute!
Thank you SO, SO much Emily!!! I wasn’t sure about the gold when I was planning things out, but I’m really happy with how it all came together!
Fabulous!!! You definitely have bragging rights on that collage – it’s perfect!!! XO, Aimee – http://www.ItsOverflowing.com
You’re super sweet! Thank you so much!!!
WoW!! Hubby and I are moving this month and I am saving this for when we redo our new lounge! I love the way you used the paper taped up to line everything up! Makes it SO much easier! Thanks for linking up with the Weekday Mixer! Stopping by as a co-host!
Thank you SO much Shana! I hope it helps to make your gallery wall a little less daunting! Good luck with the move and thanks for stopping by!
I just love this! So happy to share your blog as a guest host on Link’n Blogs this week. 🙂
xo
Daniela
http://iputabirdonit.blogspot.com
Thank you SO much Daniela! Super duper excited!!!
Great tutorial! You’re being featured on Friday Features today! http://homecomingmn.blogspot.com/2014/05/friday-diy-features.html
Thank you SO, SO much Kayla!!!
LOVE this! We’re a mother/daughter blog and while my daughter has done a gallery wall (and posted about it recently), I have yet to conquer mine. Thanks for sharing great tips and your experiences. I can’t tell you how many projects I have done and redone again. My house is always a work in progress. 🙂 I love how each gallery wall is unique and captures the personality and character or the individual. I love the pops of gold and the texture of some of the wood elements in yours. Great job!
Thank you SO much for your kind words Colleen! You are absolutely right … gallery walls are such a fabulous way to inject some creativity and personality to any space! Popping over to check out your daughters gallery wall too 🙂 Have a lovely weekend!
Hopping over from DIY Dreamer. Love, love, love your gallery wall. I can relate to having awkward spaces in our home. Seeing this gives me motivation to come up with awesome ways to make it work! Thanks for sharing.
Thank you SO, SO much Shonee! It can be tough to find a way to work around things, but a gallery wall made things so much easier!!!
I loved your Tip Me Tuesday link . {thanks girl!}
Would you like Tip Junkie to feature your blog post to over 200,000 creative women? If you upload this blog post into your Tip Junkie craft room using at least 2 images, 2 steps, and blog post URL then I can easily feature it in my RSS feed, home page, and all my social networks instantly. {squealing with delight}
~ Laurie {a.k.a. the Tip Junkie}
http://www.tipjunkie.com/post/how-to-add-a-craft-room-project-on-tip-junkie/
Thanks Laurie! I’ll get it uploaded ASAP!